Frame Flipping
Getting art prints is fun and exciting, I love the feeling of leveling up my space with a piece of art that I care about, and I would like to think that the décor in my space is a reflection of me, including the art that I choose.
Yet, getting the artwork framed could be a little frustrating, sometimes expensive, and often seem like a chore, but ever since I changed my approach towards it, I don’t mind it as much, and even enjoy it!
So What Has Changed?
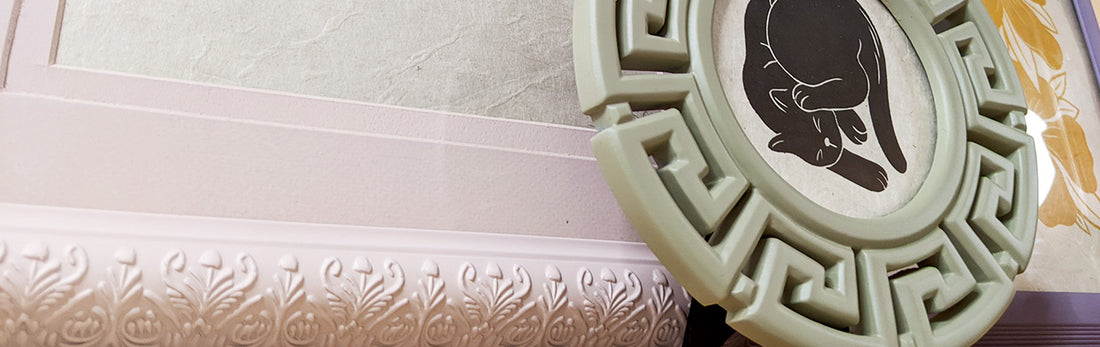
Don't get me wrong, sometimes you find the perfect frame, or just a basic simple wood frame and that can work perfectly fine. At other times, you want to achieve a specific look, color or texture, and "Frame Flipping" can be a great way to express yourself. 
It started with me trying to find a frame in a specific color and not finding it, I decided to paint it to my heart’s content, Pretty simple. But only when I started treating framing artwork as sort of a creative thing in itself, it became more fun! You see, it is and it isn’t about the frame itself. The end result is great, but the process is half the fun here. I also find that it’s nice to give an old worn down frame a new life.
What You’ll Need?
- An art piece to frame.
- A picture frame of your choosing.
- Spray paint or gouache/acrylic paint.
- A primer in the case that your spray paint does not include a paint-primer combo.
- Brushes if you prefer to paint the frame manually.
- A mask to protect yourself from the fumes of the spray paint.
- A plastic sheet, newspaper or any other way to protect the surface you are working on.

Sourcing The Frame
We need a frame to work with, so the first step would be to get one. My preferred method would be to go to my neighborly thrift store and see what they have. My thrift store experiences in the past have been more of a hit or miss situation. Sometimes I would find perfect frames at affordable prices, sometimes I would find somewhat broken frames but with potential for a transformation, and sometimes I would leave empty handed. Thrift store is also a great place to find affordable picture frames in interesting shapes and textures. Don’t get discouraged if you don’t find a frame right away. You can also buy a basic frame in a home décor or a craft store. They are usually pretty affordable, and can give a simple frame to work with.

Shopping Tip: don’t forget to bring a measuring tape with you. A lot of the frames in a thrift store won’t say the size on them, and you want to make sure your art print can fit in the frame.
Another recommendation would be to choose a frame with a glass that is not glued to the frame. If the frame and glass is a one piece, that would make it harder to paint and could result in breakage (happened to me in the past!). You can mask the glass with painters tape, but personally I prefer to take the frame apart and place the glass layer aside, until I’m done with painting.
Prepping And Painting The Frame
You’ll need to choose your paint. I’ve used both methods *(spray paint or brush painting) in the past to achieve different looks. For example you can use Spray paint, this will give you a cleaner, even layer of paint. You can also use gouache or acrylic paint. This will be used for hand painting the frames. The advantage of paint is that you can make any color you choose by mixing the paint while spray painting might be limited to a color range at the store. You can paint your own shapes, textures and have more freedom to express yourself.
When you are mixing your own paint and trying to get a single color frame, it would be best to mix enough paint for the entire project. If you keep mixing paint in small batches, it might not match completely and you’ll have different tones on your frame.
I recommend wiping your frame from any dust or debris that might be on it, otherwise dust particles are going to dry with your paint.

Once you’ve placed your protective cover on the ground or on the surface you are working on, it's time to get to painting, the fun part!
If you use spray paint, I also recommend placing your frame a little higher than the surface you're working on. Here I just used a random object I don't need anymore in order to lift the frame so it does not stick to the surface while spraying. This made my life so much easier.
If you are spraying your frame and your paint is not mixed with a primer, I recommend using one. You can skip this stage, but I find that for longevity and in order to get the best results, it’s better to go the extra mile and use a primer.
You want to wear a mask because those sprays are toxic, protect yourself!
Shake your primer/spray thoroughly for about 1 minute to make sure the paint is well mixed in there, then spray slowly in even strokes over your frame. Once you cover the frame in an even layer, follow the instructions on the label, most spray will require about an hour to dry. Some sprays might need a second layer of paint. If using premier, wait until dry and repeat this process with the spray paint.

If you want to go the extra mile (again), you can repeat the process again with a clear layer to seal the deal. This will help to preserve the paint for longer.
I also tried using paint and brushes to transform a picture frame. You can use either Gouache or Acrylic paint, it depends on the finish you'd like. I chose Gouache because I was looking for a matte finish. I just used a standard brush and I think it worked out fine. This option will result in more of a handmade look where you can see the brush strokes. Sometimes that's exactly what you want.
After your frame is fully dry, place the glass back in the frame (give it a good clean first) and frame your art. Hang it on the wall or lean it against your desk, I’m sure it will look great!
What Is The Takeaway?
There are a lot of ways to frame artwork, but being creative and painting frames yourself is a simple way to give picture frames a certain look you desire while enjoying a fun creative project. With only a few tools you can add a personal touch that can enhance your artwork. Experiment with shapes, colors and most importantly - have fun, You got this!